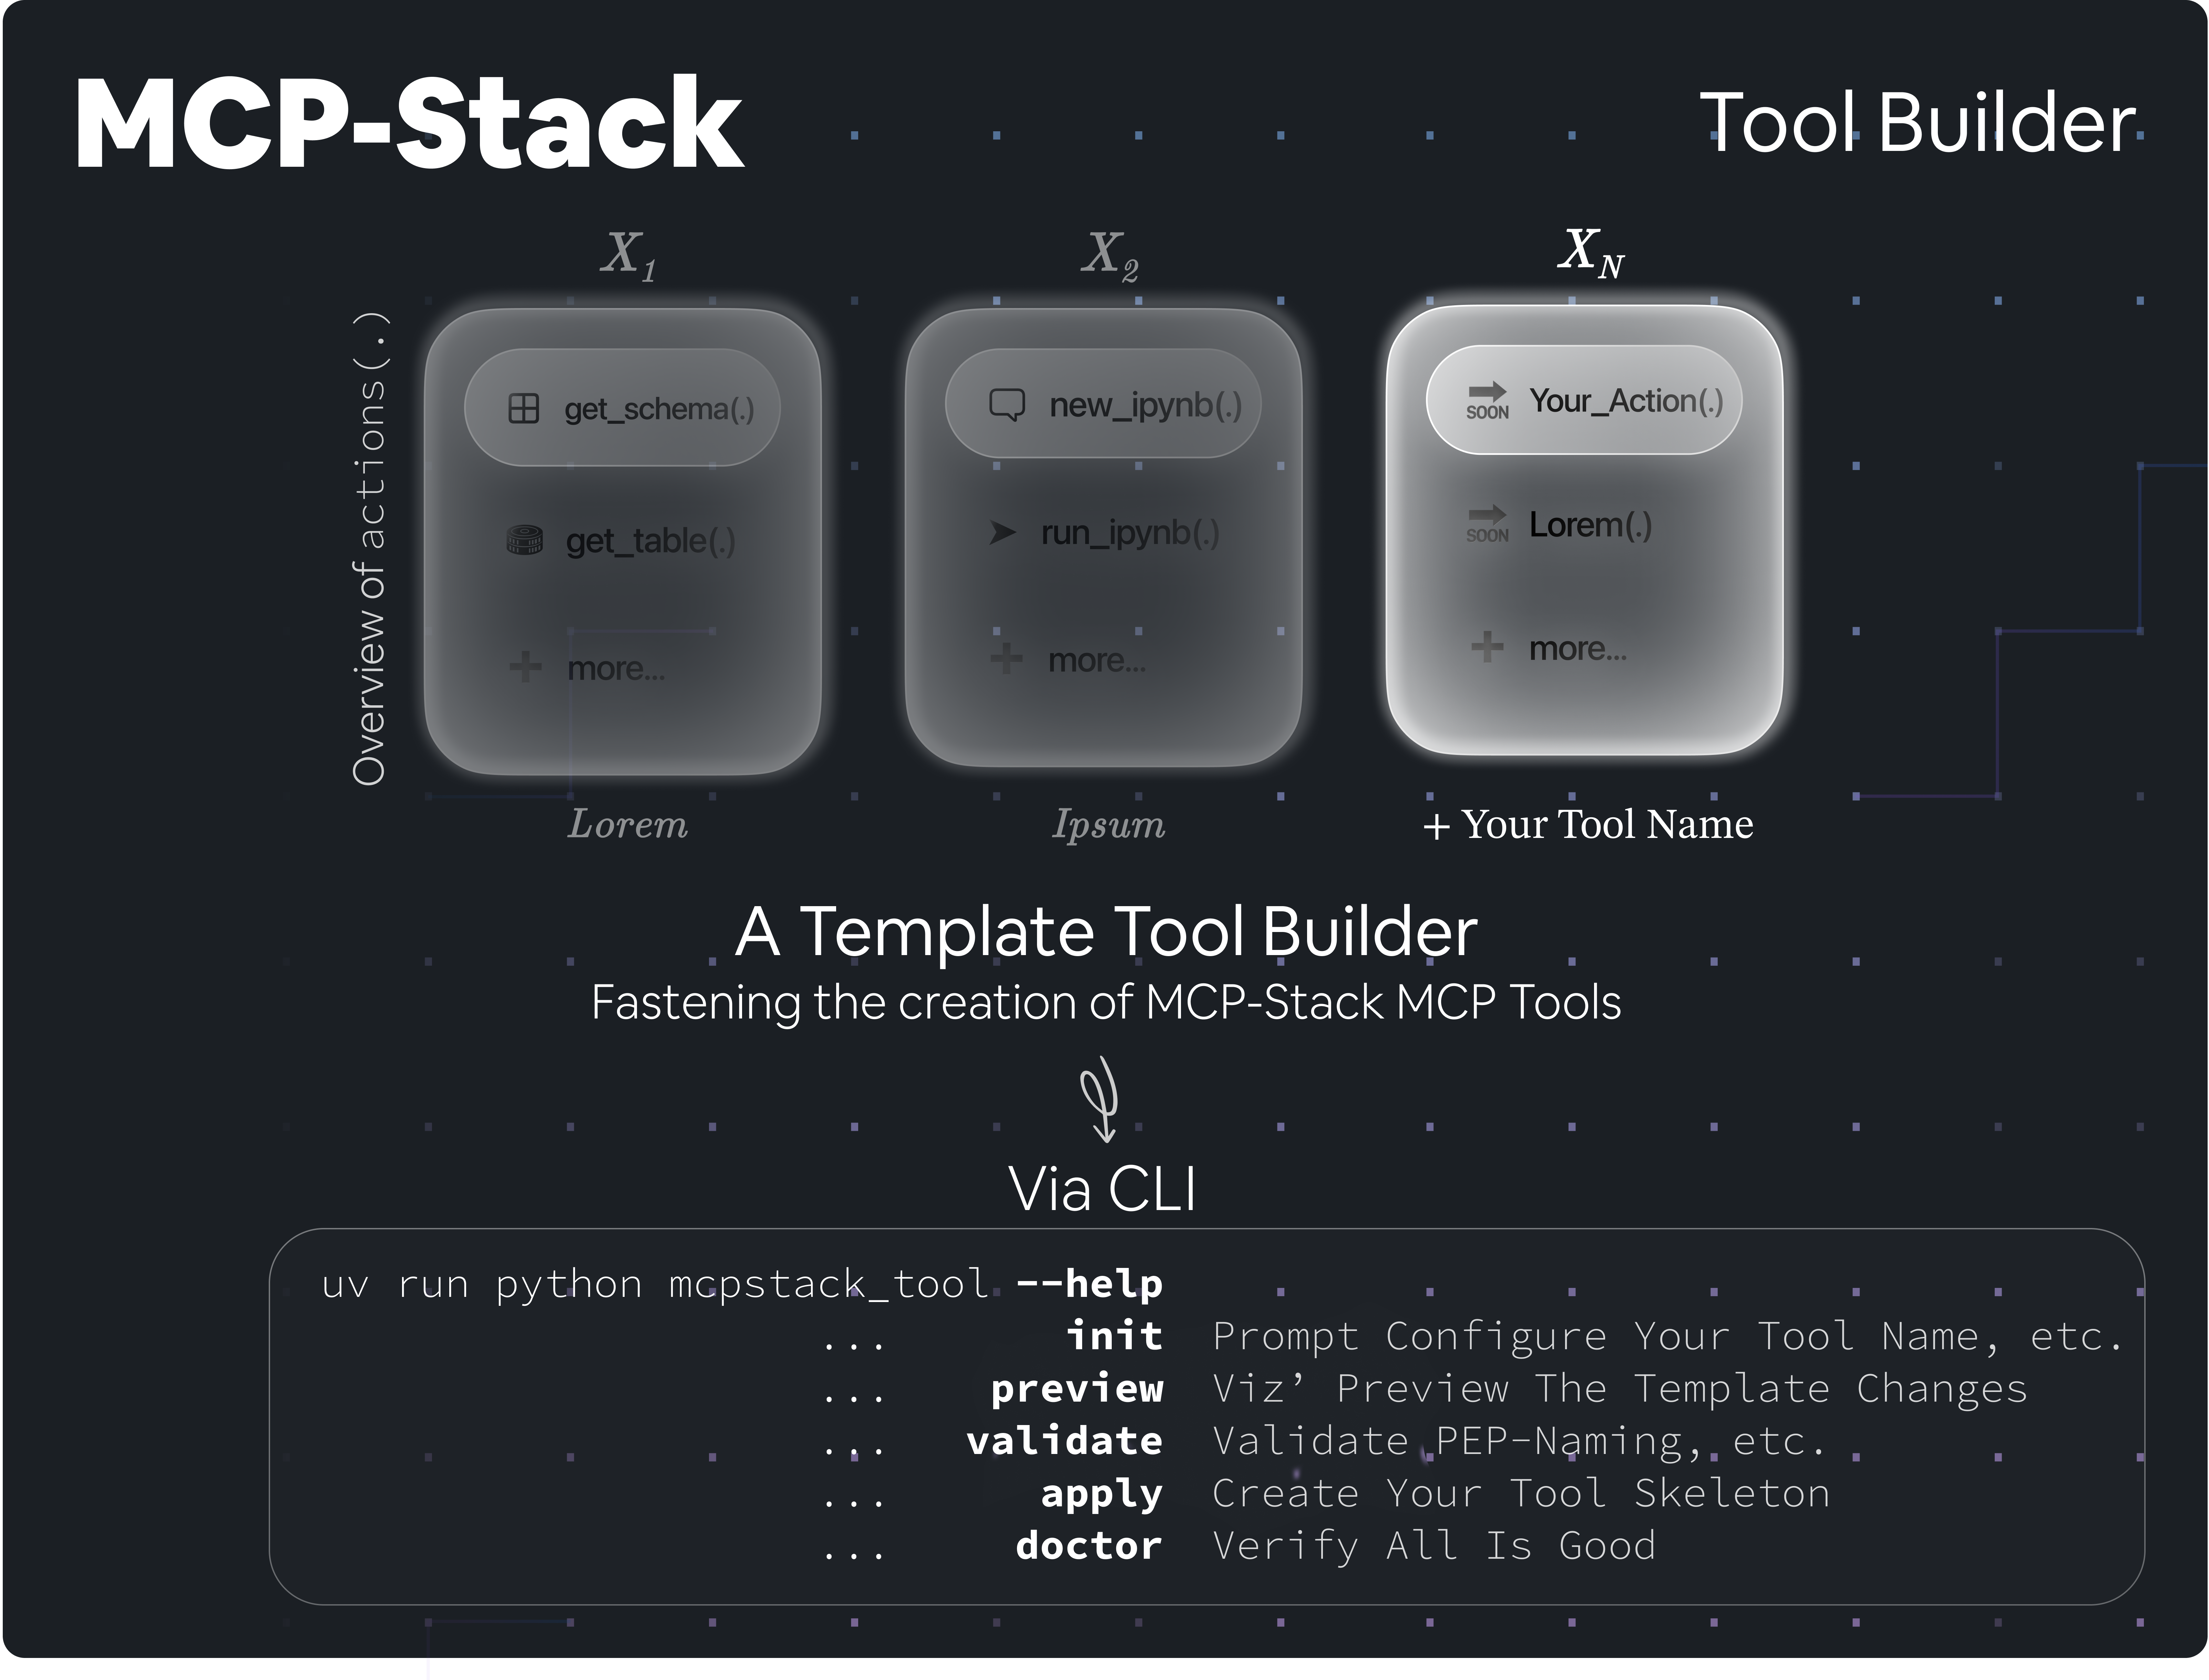
MCPStack Tool Builder
A Template To Fasten The Creation of MCP-Stack MCP Tools
[!IMPORTANT] If you have not been across the MCPStack main orchestrator repository, please start there: View Org
💡 About The Project
MCPStack Tool Builder is a template repository designed to streamline the creation of MCPStack MCP Tools.
As in, you are using the MCPStack main orchestrator repository and wish to create a new MCP tool to pipeline with.
You can always start from scratch, but certainly, our MCPStack Tool Builder will help you get started quickly with a
solid foundational skeleton builder.
Wait, what is a Model Context Protocol (MCP) & MCPStack — In layman's terms ?
The Model Context Protocol (MCP) standardises interactions with machine learning (Large Language) models, enabling tools and libraries to communicate successfully with a uniform workflow.
On the other hand, MCPStack is a framework that implements the protocol, and most importantly, allowing
developers to create pipelines by stacking MCP tools of interest and launching them all in Claude Desktop.
This allows the LLM to use all the tools stacked, and of course, if a tool is not of interest, do not include it in the
pipeline and the LLM won't have access to it.
Installation
[!NOTE] As this repository is a template, you can always create a new repository from this template. Use the "Use this template" button on the top right of the GitHub UI to create a new repository based on this template.
Meanwhile, you may alos clone this repository and install it locally to start building your own MStack MCP tool.
Clone the repository
git clone https://github.com/MCP-Pipeline/MCPStack-Tool-Builder.git
cd MCPStack-Tool-Builder
Install dependencies
Using UV (recommended —— See official UV documentation for installation of UV):
uv sync
Using pip:
pip install -e .[dev]
Install pre-commit hooks
Via UV:
uv run pre-commit install
Via pip:
pre-commit install
Create Your Tool's Skeleton
Once dependencies are installed, you can use the mcpstack_tool CLI to bootstrap and customise your tool’s skeleton.
Every commands is run with uv run mcpstack_tool.py or python mcpstack_tool.py if you are not using UV, followed by the command you want to run; as follows:
Help Banner
Run with --help or -h to display the banner and see all available commands.
uv run mcpstack_tool.py --help
Init
init starts an interactive prompt command-line-based process to generate your tool configuration.
It will ask you for values like tool_slug, class_name, and env_prefix.
Preview
preview shows you the replacements that would be applied across the codebase and displays an example diff.
Note this could be also run from the init.

Apply
Once happy, use apply to perform replacements and rename the package directory. Note this could be also run from the init.
Validate
Run validate to ensure placeholders were replaced correctly (or to check if any remain).
Reset (Optional)
Need to start fresh? Restore everything back from the scaffold with reset.
[!CAUTION] ⚠️ Use --hard to overwrite files directly.
Doctor
Finally, check the health of your repository with doctor.
It reports package dirs, entry points, and placeholder status.
Here you go! 🎉 You now have a working MCPStack tool skeleton ready to customise.
From here, edit src/mcpstack_<your_tool_name>/tool.py with the actions your MCP is aimed to be doing,
and cli.py to implement your configurability logic. Remove a couple of files and folders not necessary as per the template
and you may be good to go to submit this to the org or to play with it yourself!
Refer to the MCPStack documentation for more details on how to implement your tool logic.
🔐 License
MIT — see LICENSE.