PageFly Refund MCP Server
MCP (Model Context Protocol) server for Crisp's Hugo AI Agent to handle PageFly refund requests end-to-end.
It exposes nine tools grouped into three layers:
Lookup (mock fixtures)
check_subscription→ get the current plan for a store or emailget_billing_history→ list every bill / Upcoming charge for a store
Pure logic
classify_refund_case→ map context to one of 7 playbook cases (TH1–TH7)calculate_refund→ 30-day prorated or multi-cycle refund math with deductioncollect_refund_info→ decide the next question to ask and surface blockersgenerate_refund_message→ draft the customer reply from PageFly templates
State (Turso / libSQL)
get_case_state→ resume a case by store URLsave_case_state→ persist progress at every meaningful steplist_pending_cases→ review cases waiting on Manager, customer, or bill paid
Built with the @modelcontextprotocol Typescript SDK.
Environment
Copy .env.example to .env and fill in your Turso credentials:
TURSO_DATABASE_URL=libsql://<your-db>.turso.io
TURSO_AUTH_TOKEN=<token>
PORT=3000
Migrations run automatically at server start — safe to re-run.
Deploying to Fly.io
The repo ships with fly.toml and a Dockerfile ready to deploy. Prerequisites: a Fly.io account and the flyctl CLI installed (iwr https://fly.io/install.ps1 -useb | iex on Windows).
fly auth login

# First-time only (pick a globally-unique app name; update fly.toml if you choose a different one)
fly apps create refund-crisp-mcp

# Inject Turso credentials as Fly secrets (do NOT commit them)
fly secrets set \
  TURSO_DATABASE_URL="libsql://<your-db>.turso.io" \
  TURSO_AUTH_TOKEN="<token>"

fly deploy
The MCP endpoint will then be available at https://<your-app>.fly.dev/mcp.
I. Installing & Running
To get started with this MCP server, you can either run it locally or use the hosted version.
Using the hosted version
This MCP server comes already hosted at and ready to be connected to your Crisp workspace if you wish to test it out quickly. You can access it at: https://crisp-mcp-demo.fly.dev/mcp
Running locally
Pre-requisites:
- Node.js
24.xinstalled - a keyboard (optional, but recommended)
Step 1 — Cloning the repo
Open a terminal in your desired folder and run:
git clone https://github.com/NTHieu002/refund-crisp-mcp.git
cd refund-crisp-mcp
Step 2 — Running the server
You can either build and start the server, or run it directly in dev mode.
To build and run the server, use:
npm ci
npm run build
npm run start
Or to run it in dev mode with tsx (watch mode), use:
npm ci
npm run dev
Step 3 — Exposing the server (if running locally)
If you wish to run the server locally, you will need to expose it through a tunnel so that Crisp can reach it. This package is pre-configured to use Cloudflared, though you can use any tunneling solution you prefer.
If Cloudflared is not yet installed on your machine, follow this link to find the installation instructions for your OS:
Once installed, open a new terminal and run:
npm run tunnel
You can visit your tunnel's url to confirm it's working. You should see a greeting message.
Available scripts
npm run dev→ dev server (watch)npm run build→ compile TypeScriptnpm run start→ run compiled servernpm run tunnel→ expose localhost via Cloudflare Tunnelnpm run inspect→ runs the @modelcontextprotocol Inspector
II. Connecting to Crisp
This section is a quickstart guide to connect this MCP server to your Crisp workspace. We recommend also checking out our official documentation for more detailed instructions.
Pre-requisites:
- a Crisp account
- a Crisp workspace on Essentials or Plus plan
Step 1 — Navigate to app.crisp.chat
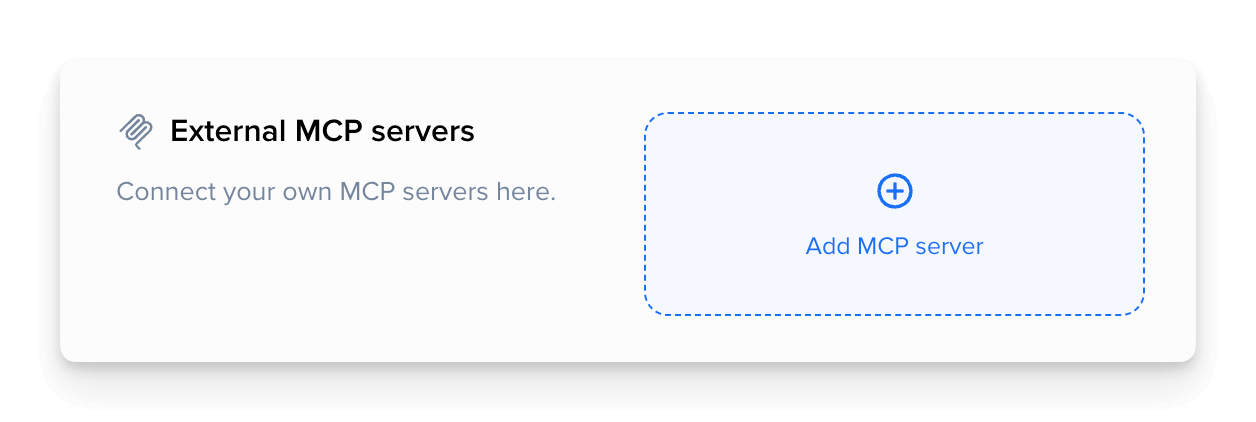
Step 2 — In the AI Agent menu, head over to AI Agent → Automate → Integrations & MCP → External MCP servers** and click on the **Add MCP server** zone.
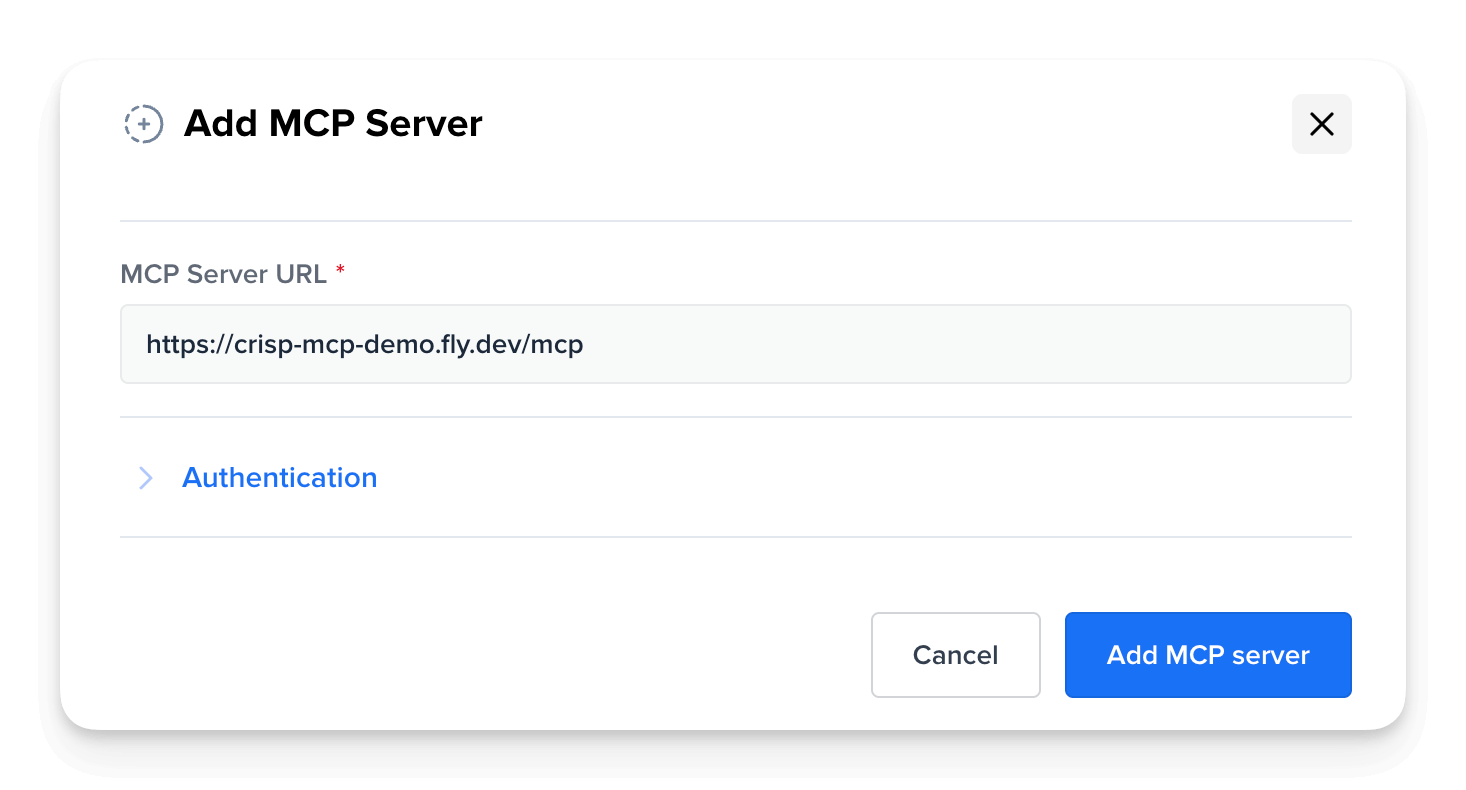
Step 3 — Enter your MCP server's URL (either your hosted/tunneled URL our hosted version) and hit Add MCP Server.
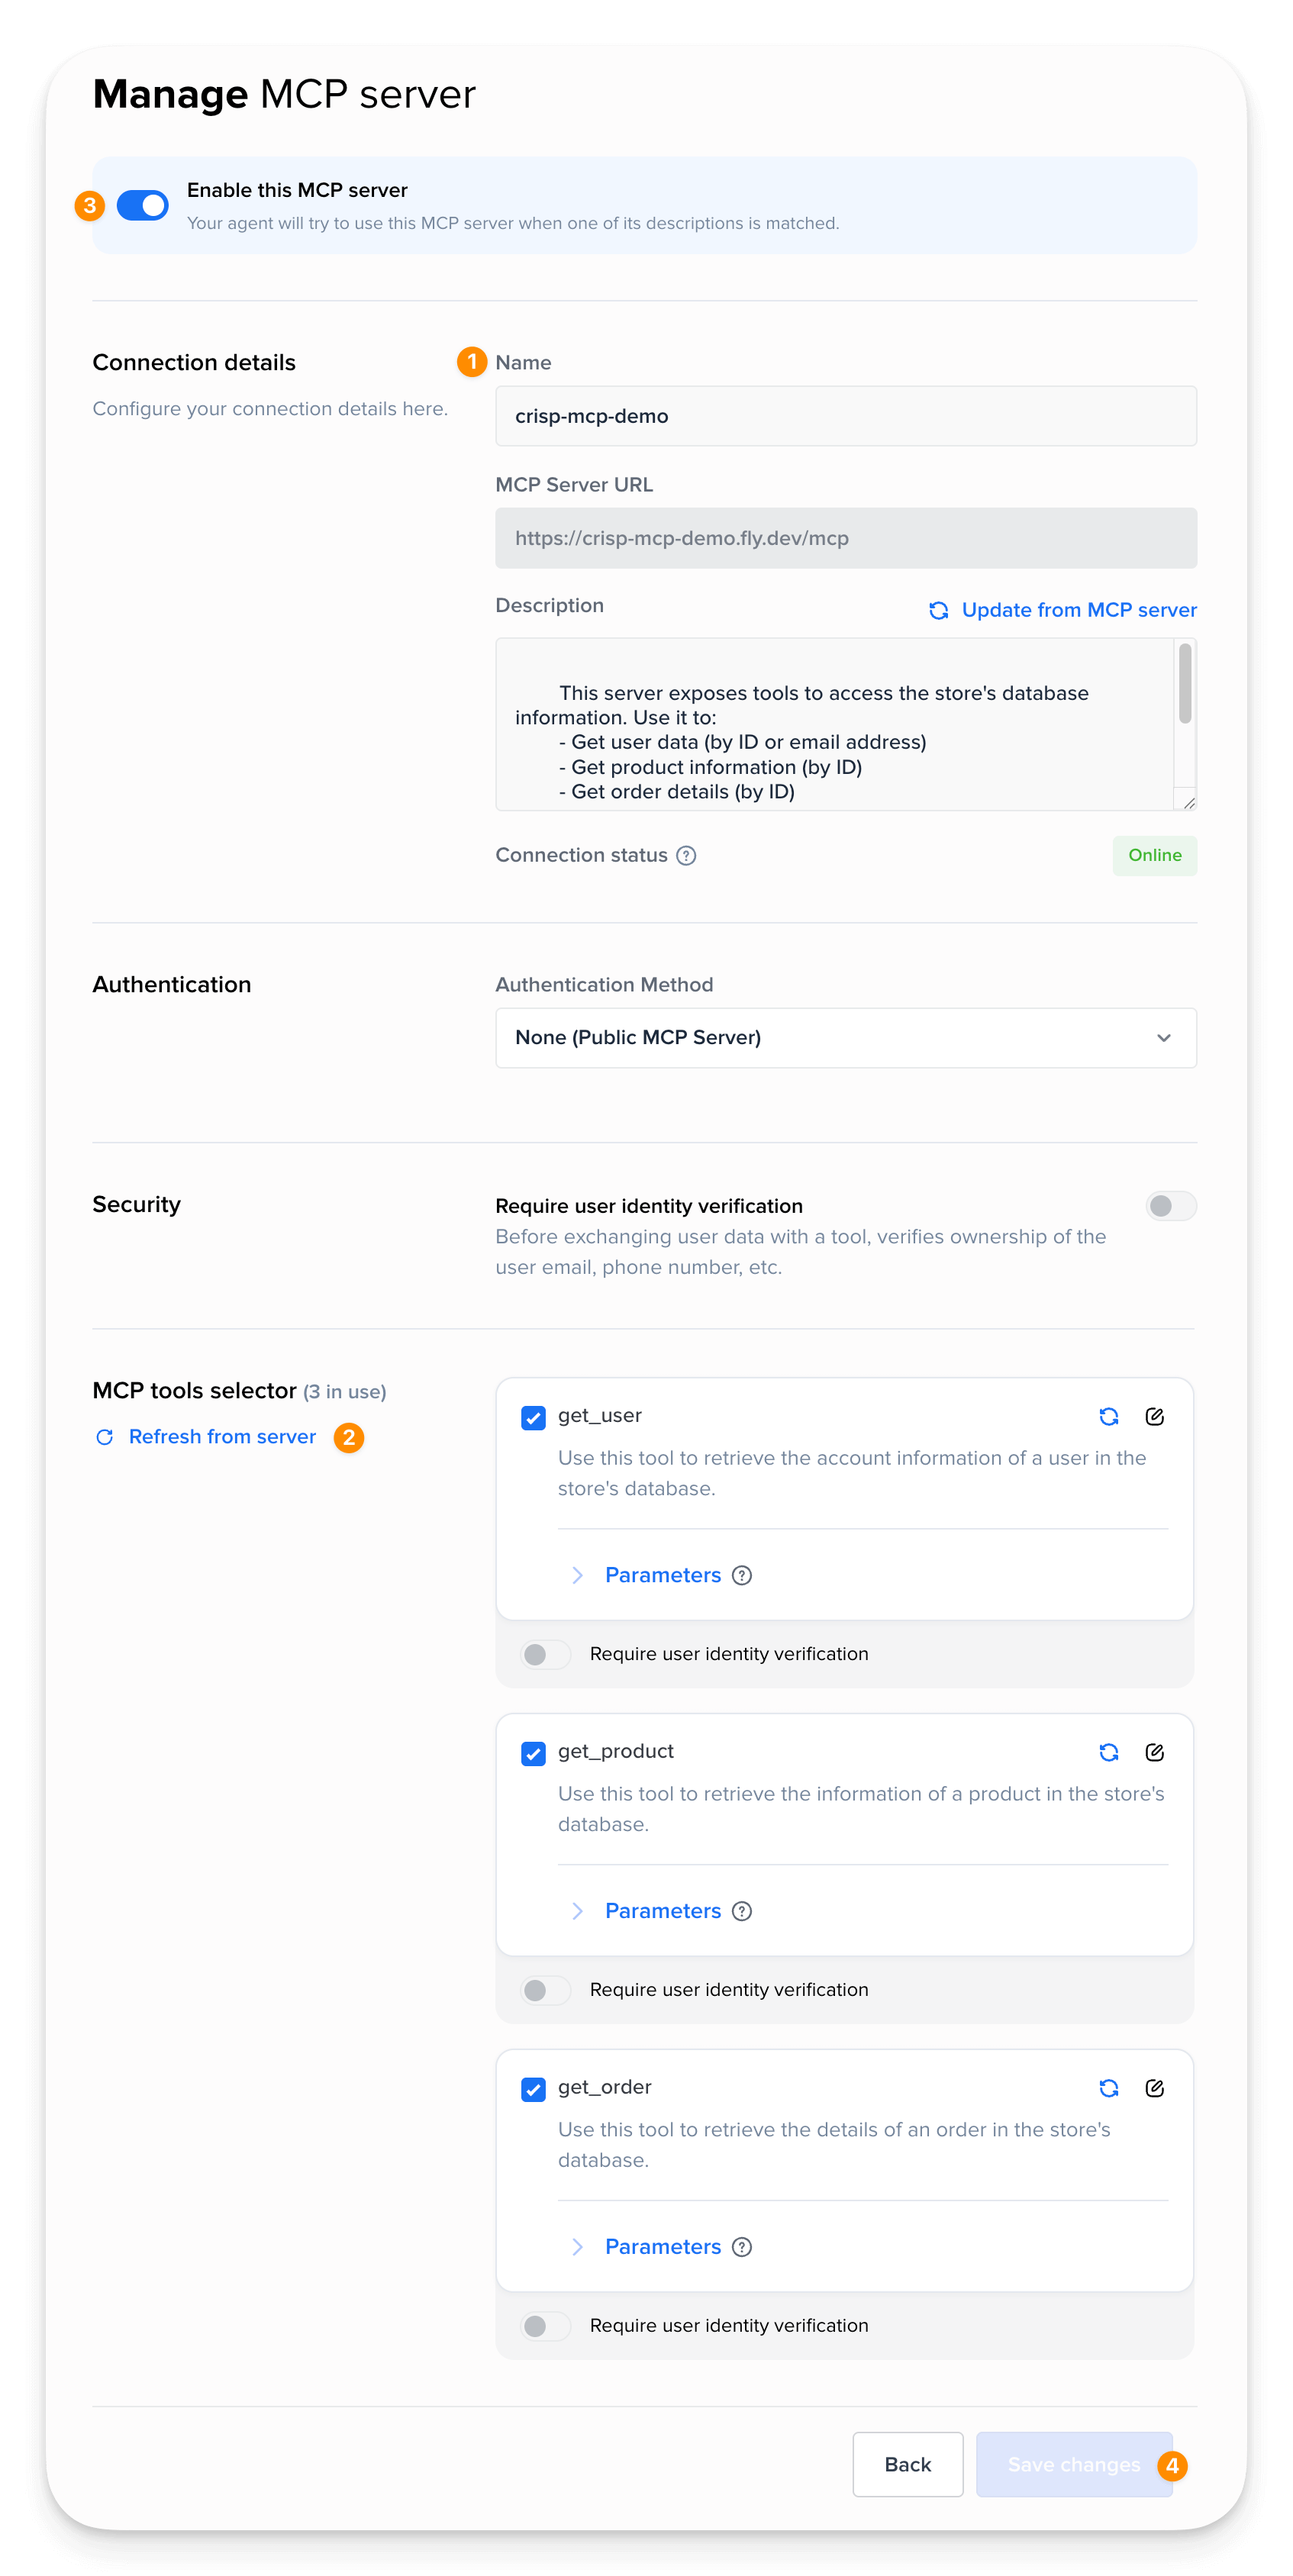
Step 4 — Configure the MCP server:
- Name it
- Hit Refresh tools from server if your tools were not fetched automatically
- Enable the MCP server
- Hit the Save changes button
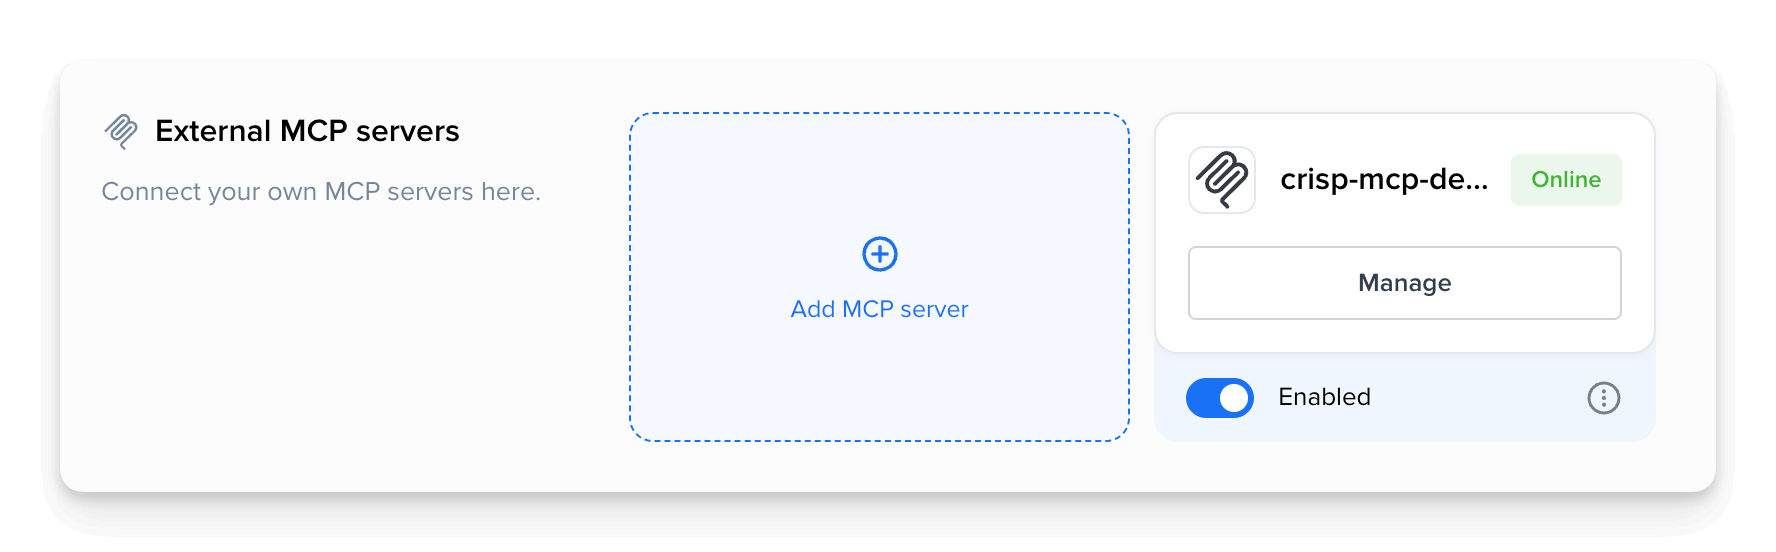
Step 5 — Your MCP server should now be registered and ready to use!
III. Testing the MCP server
Still in the Automations menu, you can go to Playground to test your MCP server and different AI models. Ask it a question!
Playground examples
One-shot questions:
Could you check if the refund of my order
OID_002has been processed?
Hi, are the notifications enabled on my account
baptiste@acme.com?
The AI can chain multiple tool calls (eg. find your accunt, list recent orders and get product details):
Are the items of my order
OID_001still under warranty?
When will my latest order be delivered? I'm
chris@acme.com
Also try partial questions, and let the AI request additional information from you:
What was the amount of my last order?
I can't find my tracking number, can you help me?
Available accounts & orders
- chris@acme.com
OID_003OID_006
- baptiste@acme.com
OID_001OID_004
- dinis@acme.com
OID_002OID_005OID_007
MCP good practices
MCP Design
- Server description: Describe the general purpose of the MCP server
- Tool naming: use clear and explicit names (e.g.
get_order, notorderLookup) - Tool descriptions: Concisely describe what the tool does, when to call it, and optionally provide use-case examples
- Schemas: Provide precise schemas for tool inputs to ensure correct usage
User Verification
In your MCP server configuration, you can also optionally require users to authenticate themselves before the AI can call a MCP tool. This reinforces security over sensitive operations.
If the user is not alredy authenticated, Crisp will send them an OTP code via email or SMS before allowing the AI to call your MCP tool.
To do that, simply navigate to your MCP server and hit Manage. On each tool, you can toggle the Require user identification verification option.
Server Authentication
In production, you may want to restrict the access to your MCP server and prevent unauthorized usage. Two authentication methods are available:
- Bearer Token: a static token sent in the
Authorizationheader of each request - Basic Auth: a username and password sent in the
Authorizationheader of each request